In this blog post, we delve further into the fascinating journey of crafting a retro-style game console entirely from the ground up—an extension of my previous article.
The initial version was constructed using the RPi Pico as the main board, with additional modules integrated around it. Nevertheless, for the upcoming iteration, I aimed to elevate the intrigue further and opted to create a custom printed circuit board (PCB) specifically tailored for the console.
Learning KiCad:
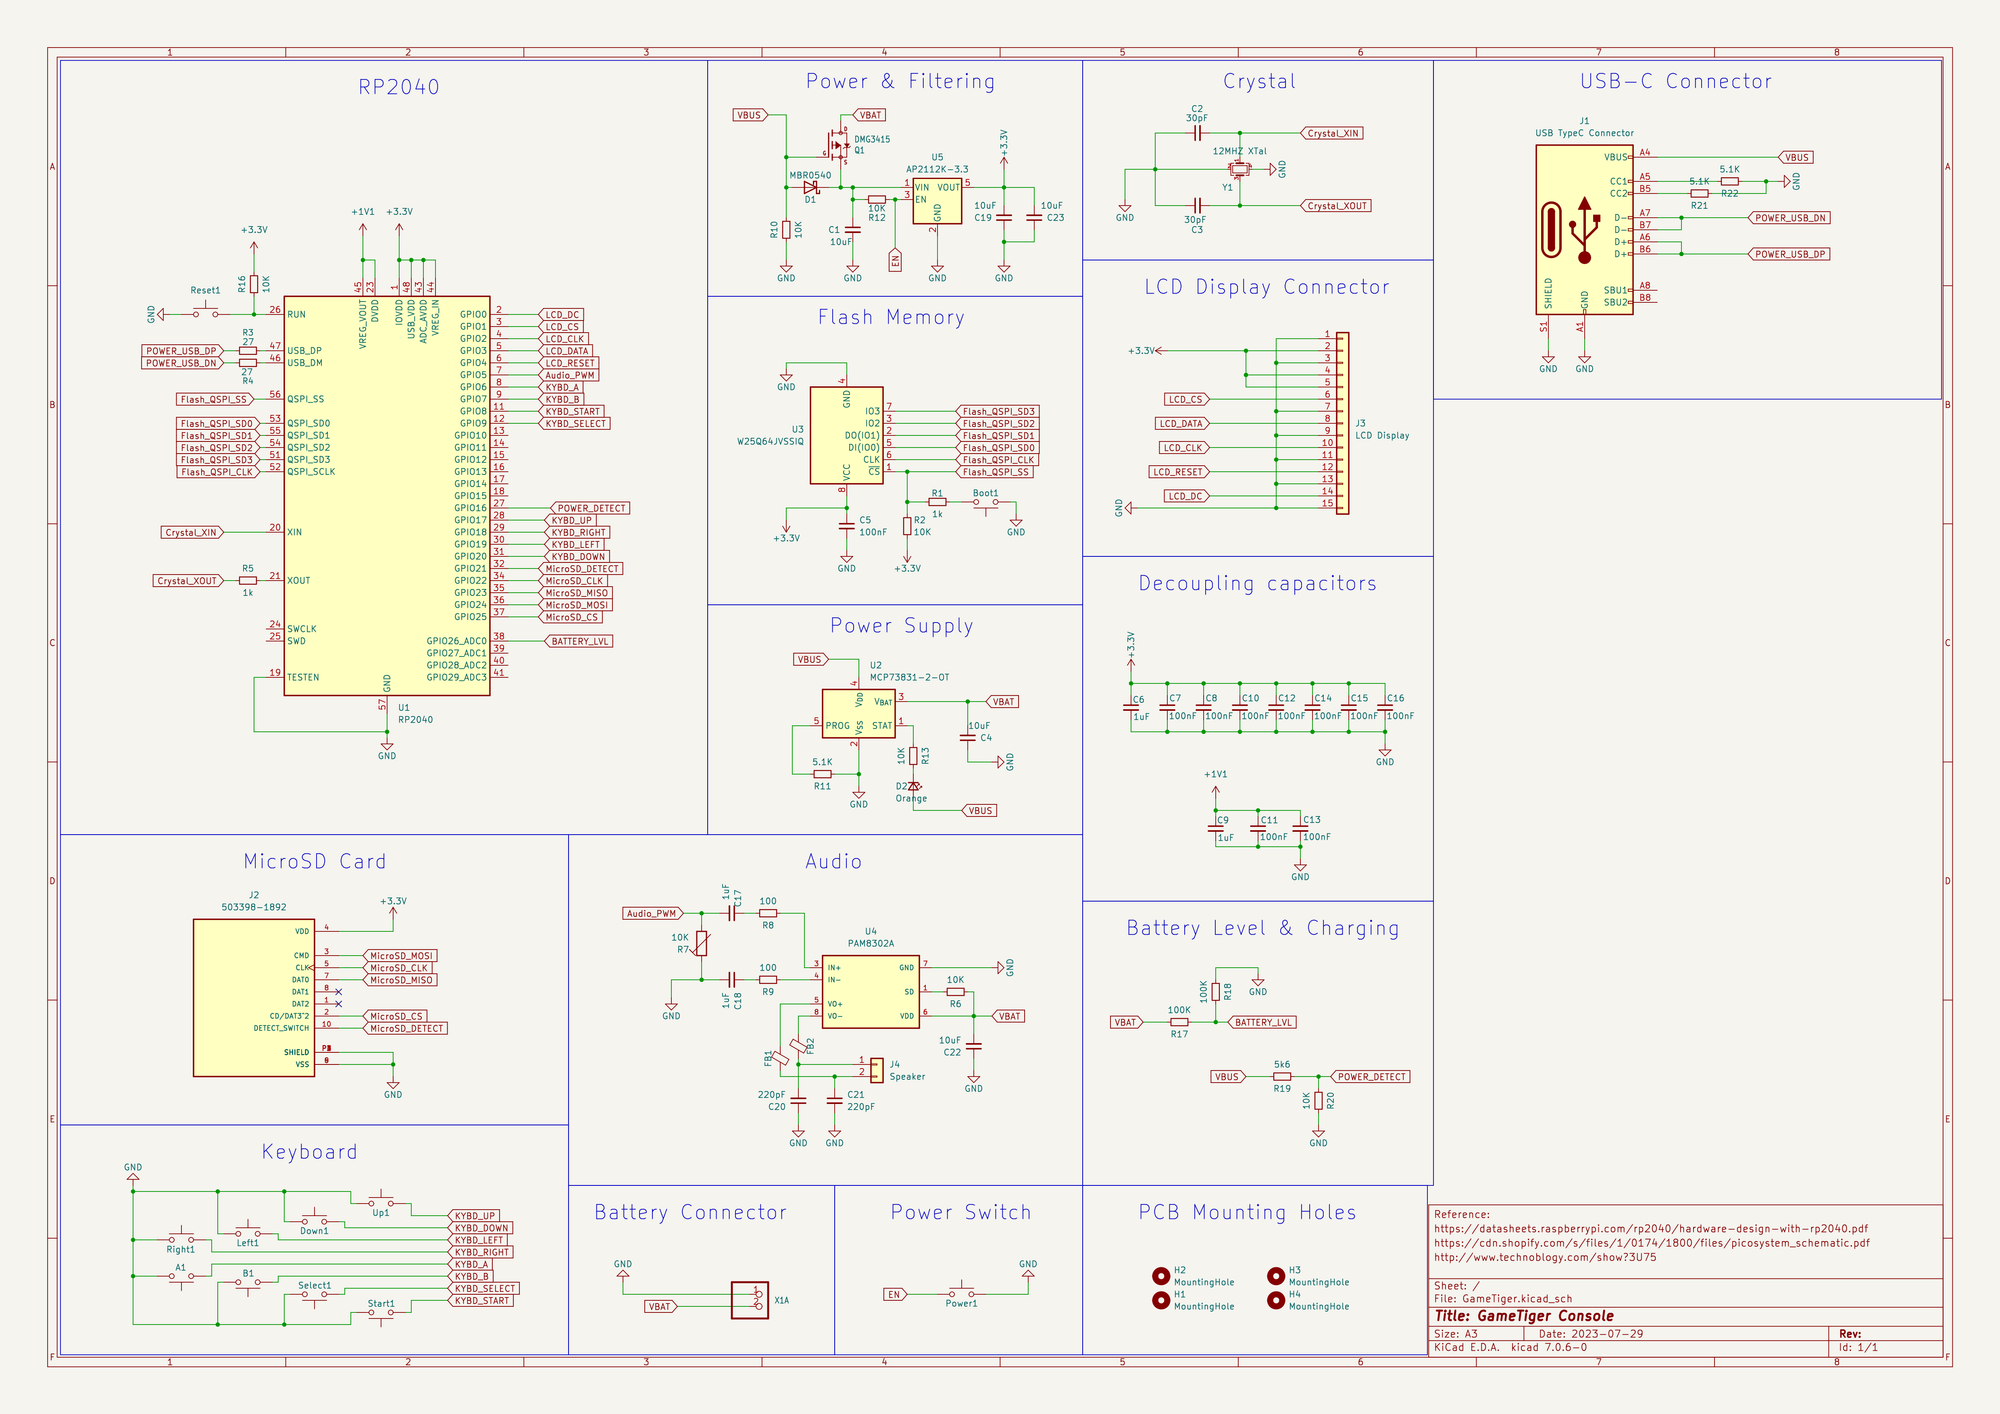
After dabbling with a bunch of design tools, free and fancy ones included, I finally found my groove with KiCad. It might not be the superstar of design tools, but it’s got the basics and a killer community to back it up. Jumping into open source tools is always a bit of a rollercoaster at the start, with the learning curve feeling like a mountain. Wrangling the PCB design in KiCad took me a good few months—about 10 iterations’ worth—to get it just right and comfy. Shoutout to the myriad open source RP2040 boards, especially the ones from Adafruit, for teaching me the nitty-gritty of PCB design.
PCB Design and Fabrication Journey:
So, as a newbie PCB designer, I was on the edge when my design was almost ready. I kept going over it for what felt like the gazillionth time, fearing something might go south. After a few months of this madness, I finally decided that my design was good to go for fabrication.
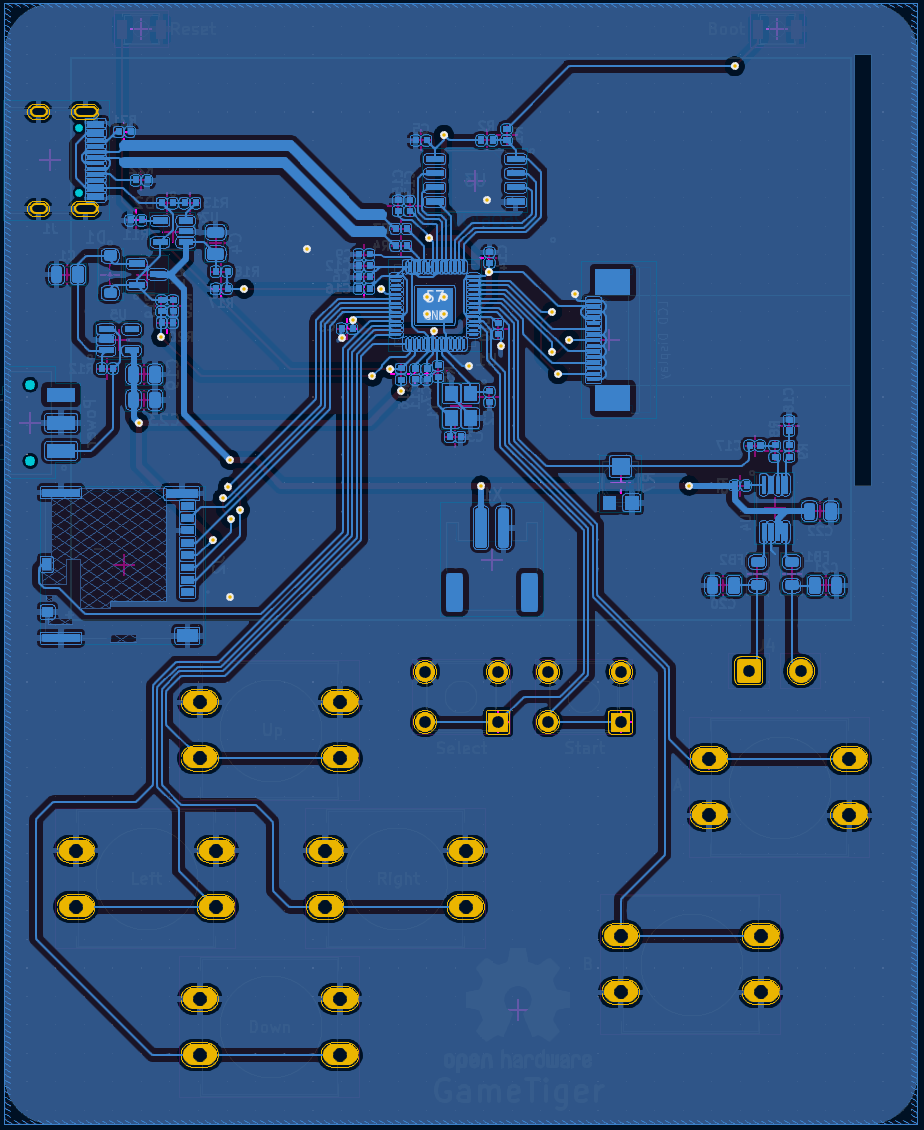
Now, the real challenge kicked in – picking a fabrication vendor and choosing components based on what’s available. I played around with changes for different vendors, which meant going back to the drawing board a few times. Eventually, I settled on this fab company in China that’s pretty famous. They did an awesome job, and the customs charges were surprisingly easy on the wallet.
Playing with Device Drivers:
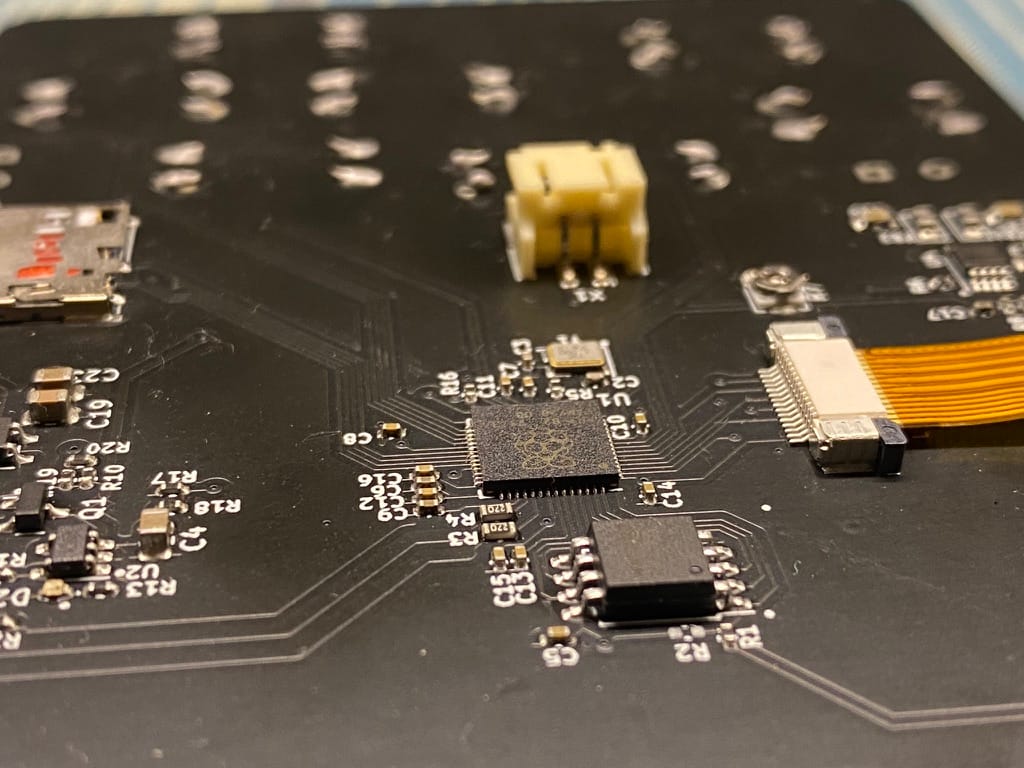
So, when the PCBs finally rolled in, my first move was checking if the device played nice in both boot mode and regular mode. To my surprise, I managed to slap on a hello world code without a hitch. A bunch of folks diving into custom PCB designs for the first time were griping about devices not getting detected or struggling to upload code. Lucky for me, everything worked like a charm, though I did goof up on the SPI pins for the SD Card.
I picked pins for both the LCD and SD Card that danced to the same SPI controller. That meant I could only use one at a time. Not a biggie for me, though, since I had no plans to give SD Card some love in the near future. Even if I change my mind, I can still resort to PIO programming to make it happen. I tinkered with Micropython and managed to juggle both the LCD and SD Card without breaking a sweat on the performance front. Since the LCD is one of those devices that’s a bandwidth hog, I couldn’t afford any dips in performance there.
Achieving a Fully Operational OS:
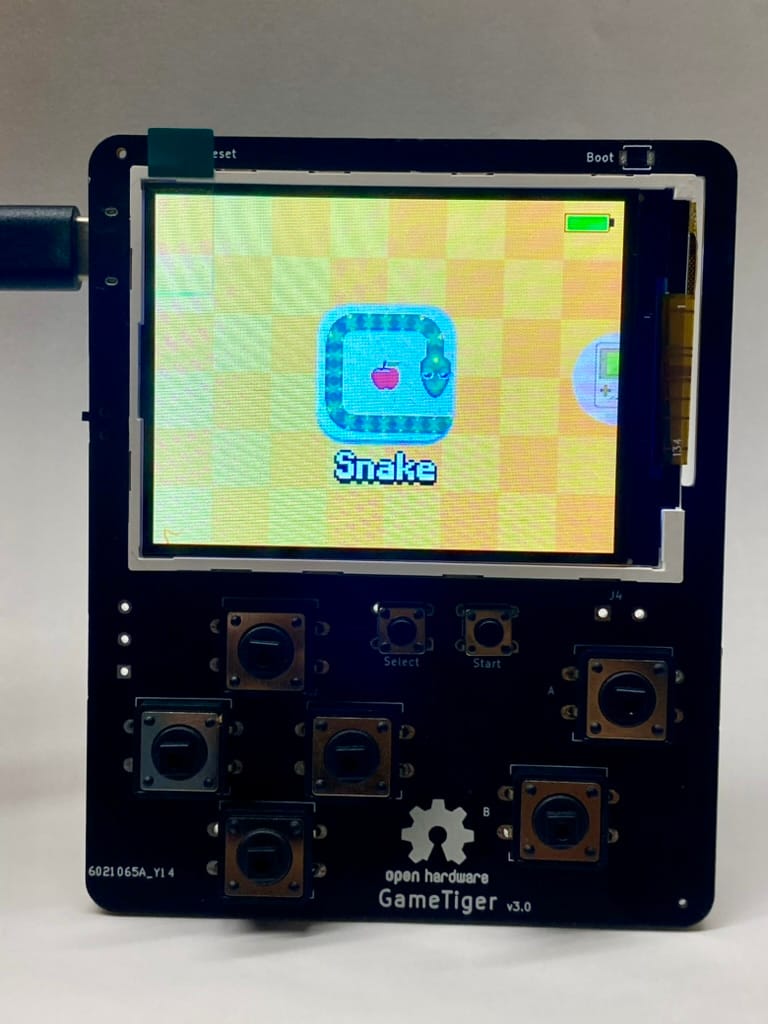
After a few more months of grappling with challenges, I triumphed in getting all the devices on the custom PCB up and running, mirroring the functionality of the previous device version without any compromises. Witnessing the games come to life on the new device brought a huge smile to my face. It’s been quite a journey!
Open Source:
The project remains true to its roots, with both the hardware and software being fully open source and accessible in the repository GameTiger Console source.